165 lines
5.7 KiB
Markdown
165 lines
5.7 KiB
Markdown
# Kendryte Dev Tool for Visual Studio Code
|
||
|
||
[](https://raw.githubusercontent.com/kendryte/Kendryte-dev-extension/master/LICENSE)
|
||

|
||
|
||
[English](https://raw.githubusercontent.com/kendryte/Kendryte-dev-extension/master/README_EN.md)
|
||
|
||
- [使用准备](#使用准备)
|
||
- [快速开始](#快速开始)
|
||
- [项目结构](#项目结构)
|
||
- [界面功能介绍](#界面功能介绍)
|
||
- [常见问题](#常见问题)
|
||
- [Windows](#Windows)
|
||
- [MacOS](#MacOS)
|
||
- [Linux](#Linux)
|
||
- [Roadmap](#Roadmap)
|
||
|
||
## 使用准备
|
||
|
||
首先安装 [VSCode](https://code.visualstudio.com/)。安装完毕后在 VSCode Extension 中搜索 Kendryte, 即可快速安装本插件。本插件目前仅支持 Kendryte 官方开发板 KD233。
|
||
|
||
[Python 3.4.4](https://www.python.org/downloads/release/python-344/)
|
||
|
||
### MacOS 环境准备
|
||
|
||
1.安装 Homebrew
|
||
|
||
``` bash
|
||
/usr/bin/ruby -e "$(curl -fsSL https://raw.githubusercontent.com/Homebrew/install/master/install)"
|
||
```
|
||
|
||
2.安装所需依赖
|
||
|
||
``` bash
|
||
brew install libusb mpfr
|
||
```
|
||
|
||
### Linux 环境准备
|
||
|
||
#### 依赖安装
|
||
|
||
Linux 用户在使用之前需要安装 libftdi-dev libhidapi-dev libusb 。
|
||
|
||
``` bash
|
||
sudo apt install libftdi-dev libhidapi-dev libusb-dev
|
||
```
|
||
|
||
或者
|
||
|
||
``` bash
|
||
sudo yum install libftdi hidapi libusb
|
||
```
|
||
|
||
#### 配置调试器权限
|
||
|
||
1.下载 [60-openocd.rules](https://mirrors-kendryte.s3.cn-northwest-1.amazonaws.com.cn/60-openocd.rules) 文件并将文件放入 `/etc/udev/rules.d`
|
||
|
||
2.重载 udev
|
||
|
||
``` bash
|
||
sudo udevadm control --reload
|
||
```
|
||
|
||
3.添加用户到 plugdev 用户组
|
||
|
||
``` bash
|
||
sudo usermod -aG plugdev $USER
|
||
```
|
||
|
||
## 快速开始
|
||
|
||
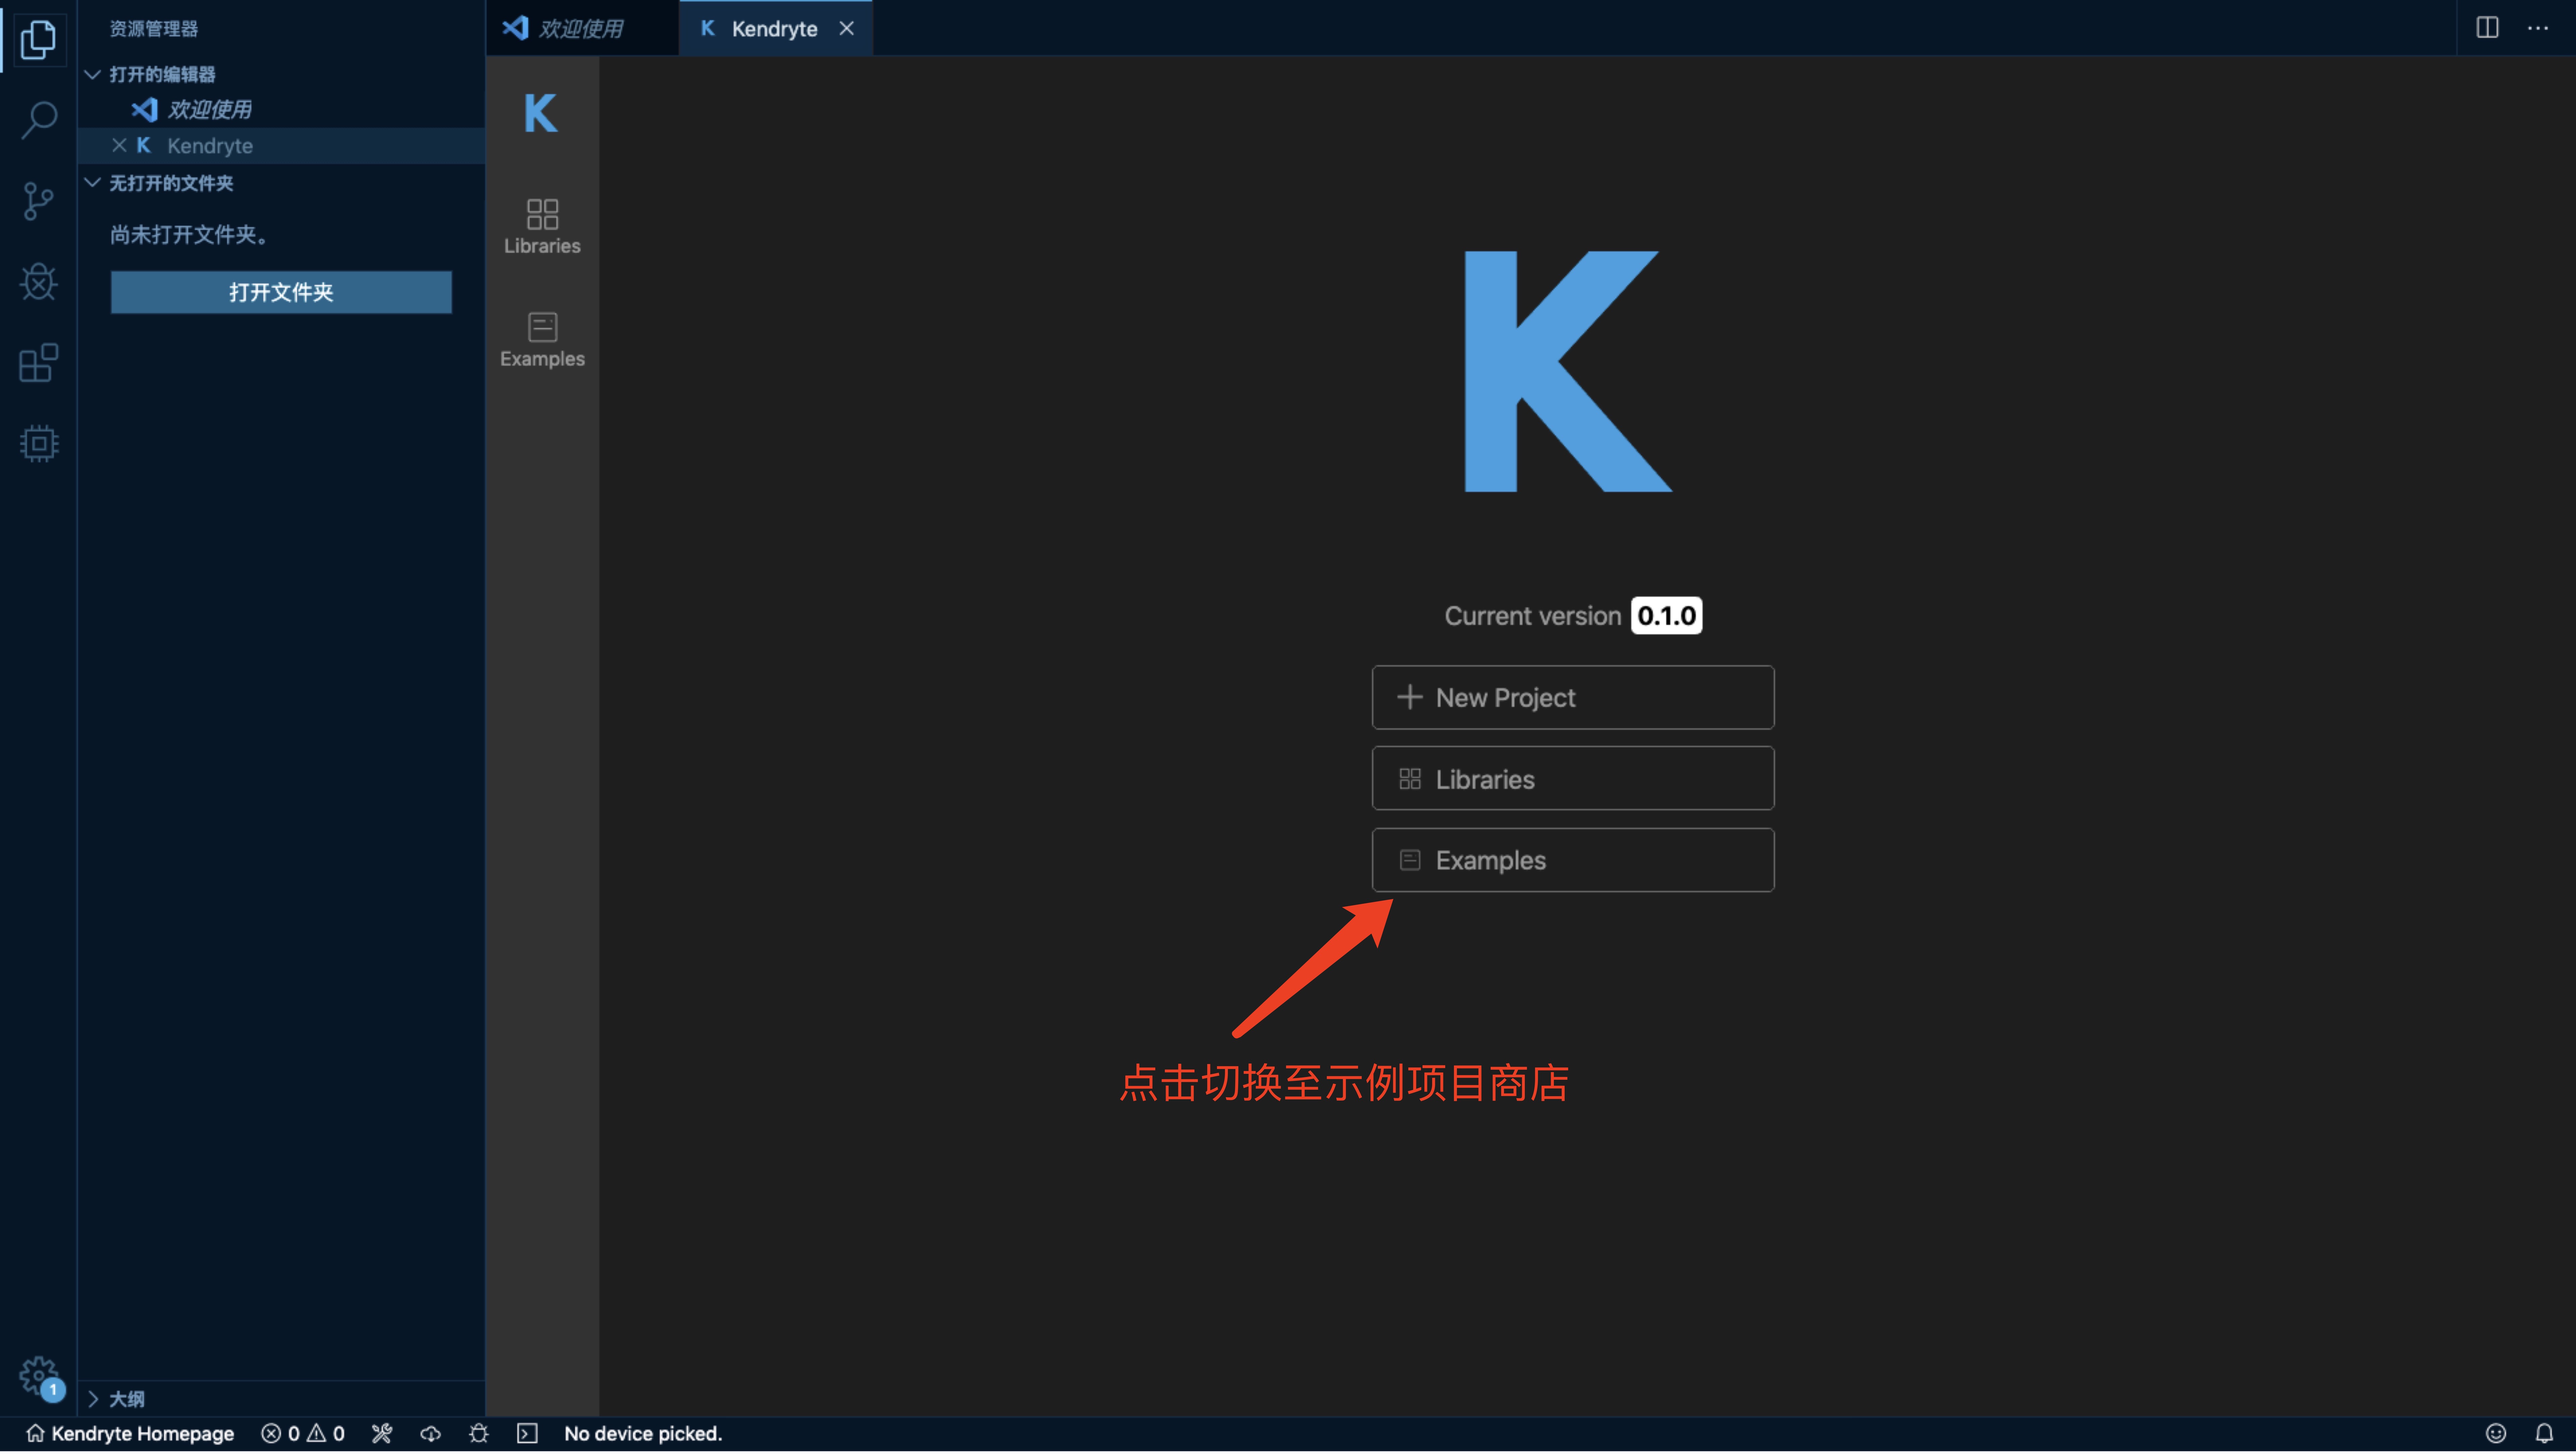
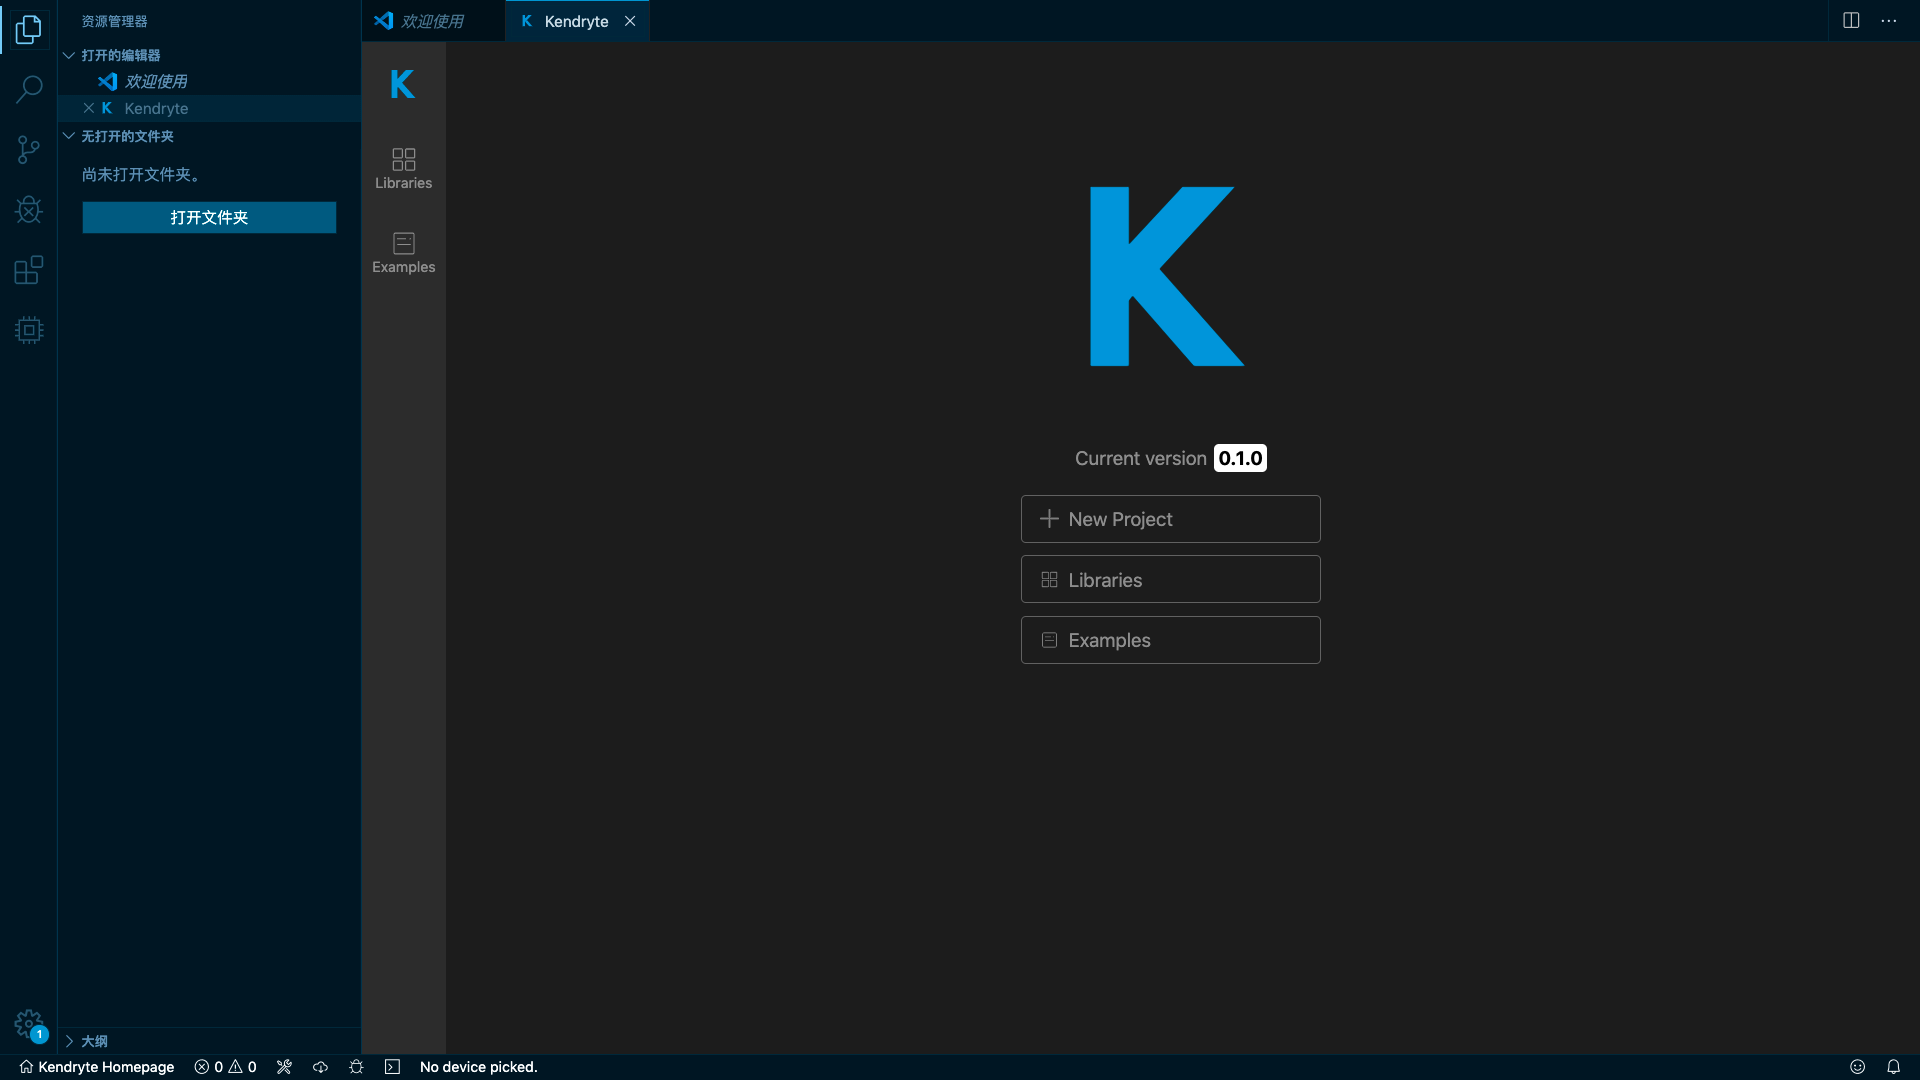
1.启动插件后,Kendryte 控制台会自动弹出,点击 Examples 切换至示例项目商店。
|
||
|
||
|
||
|
||
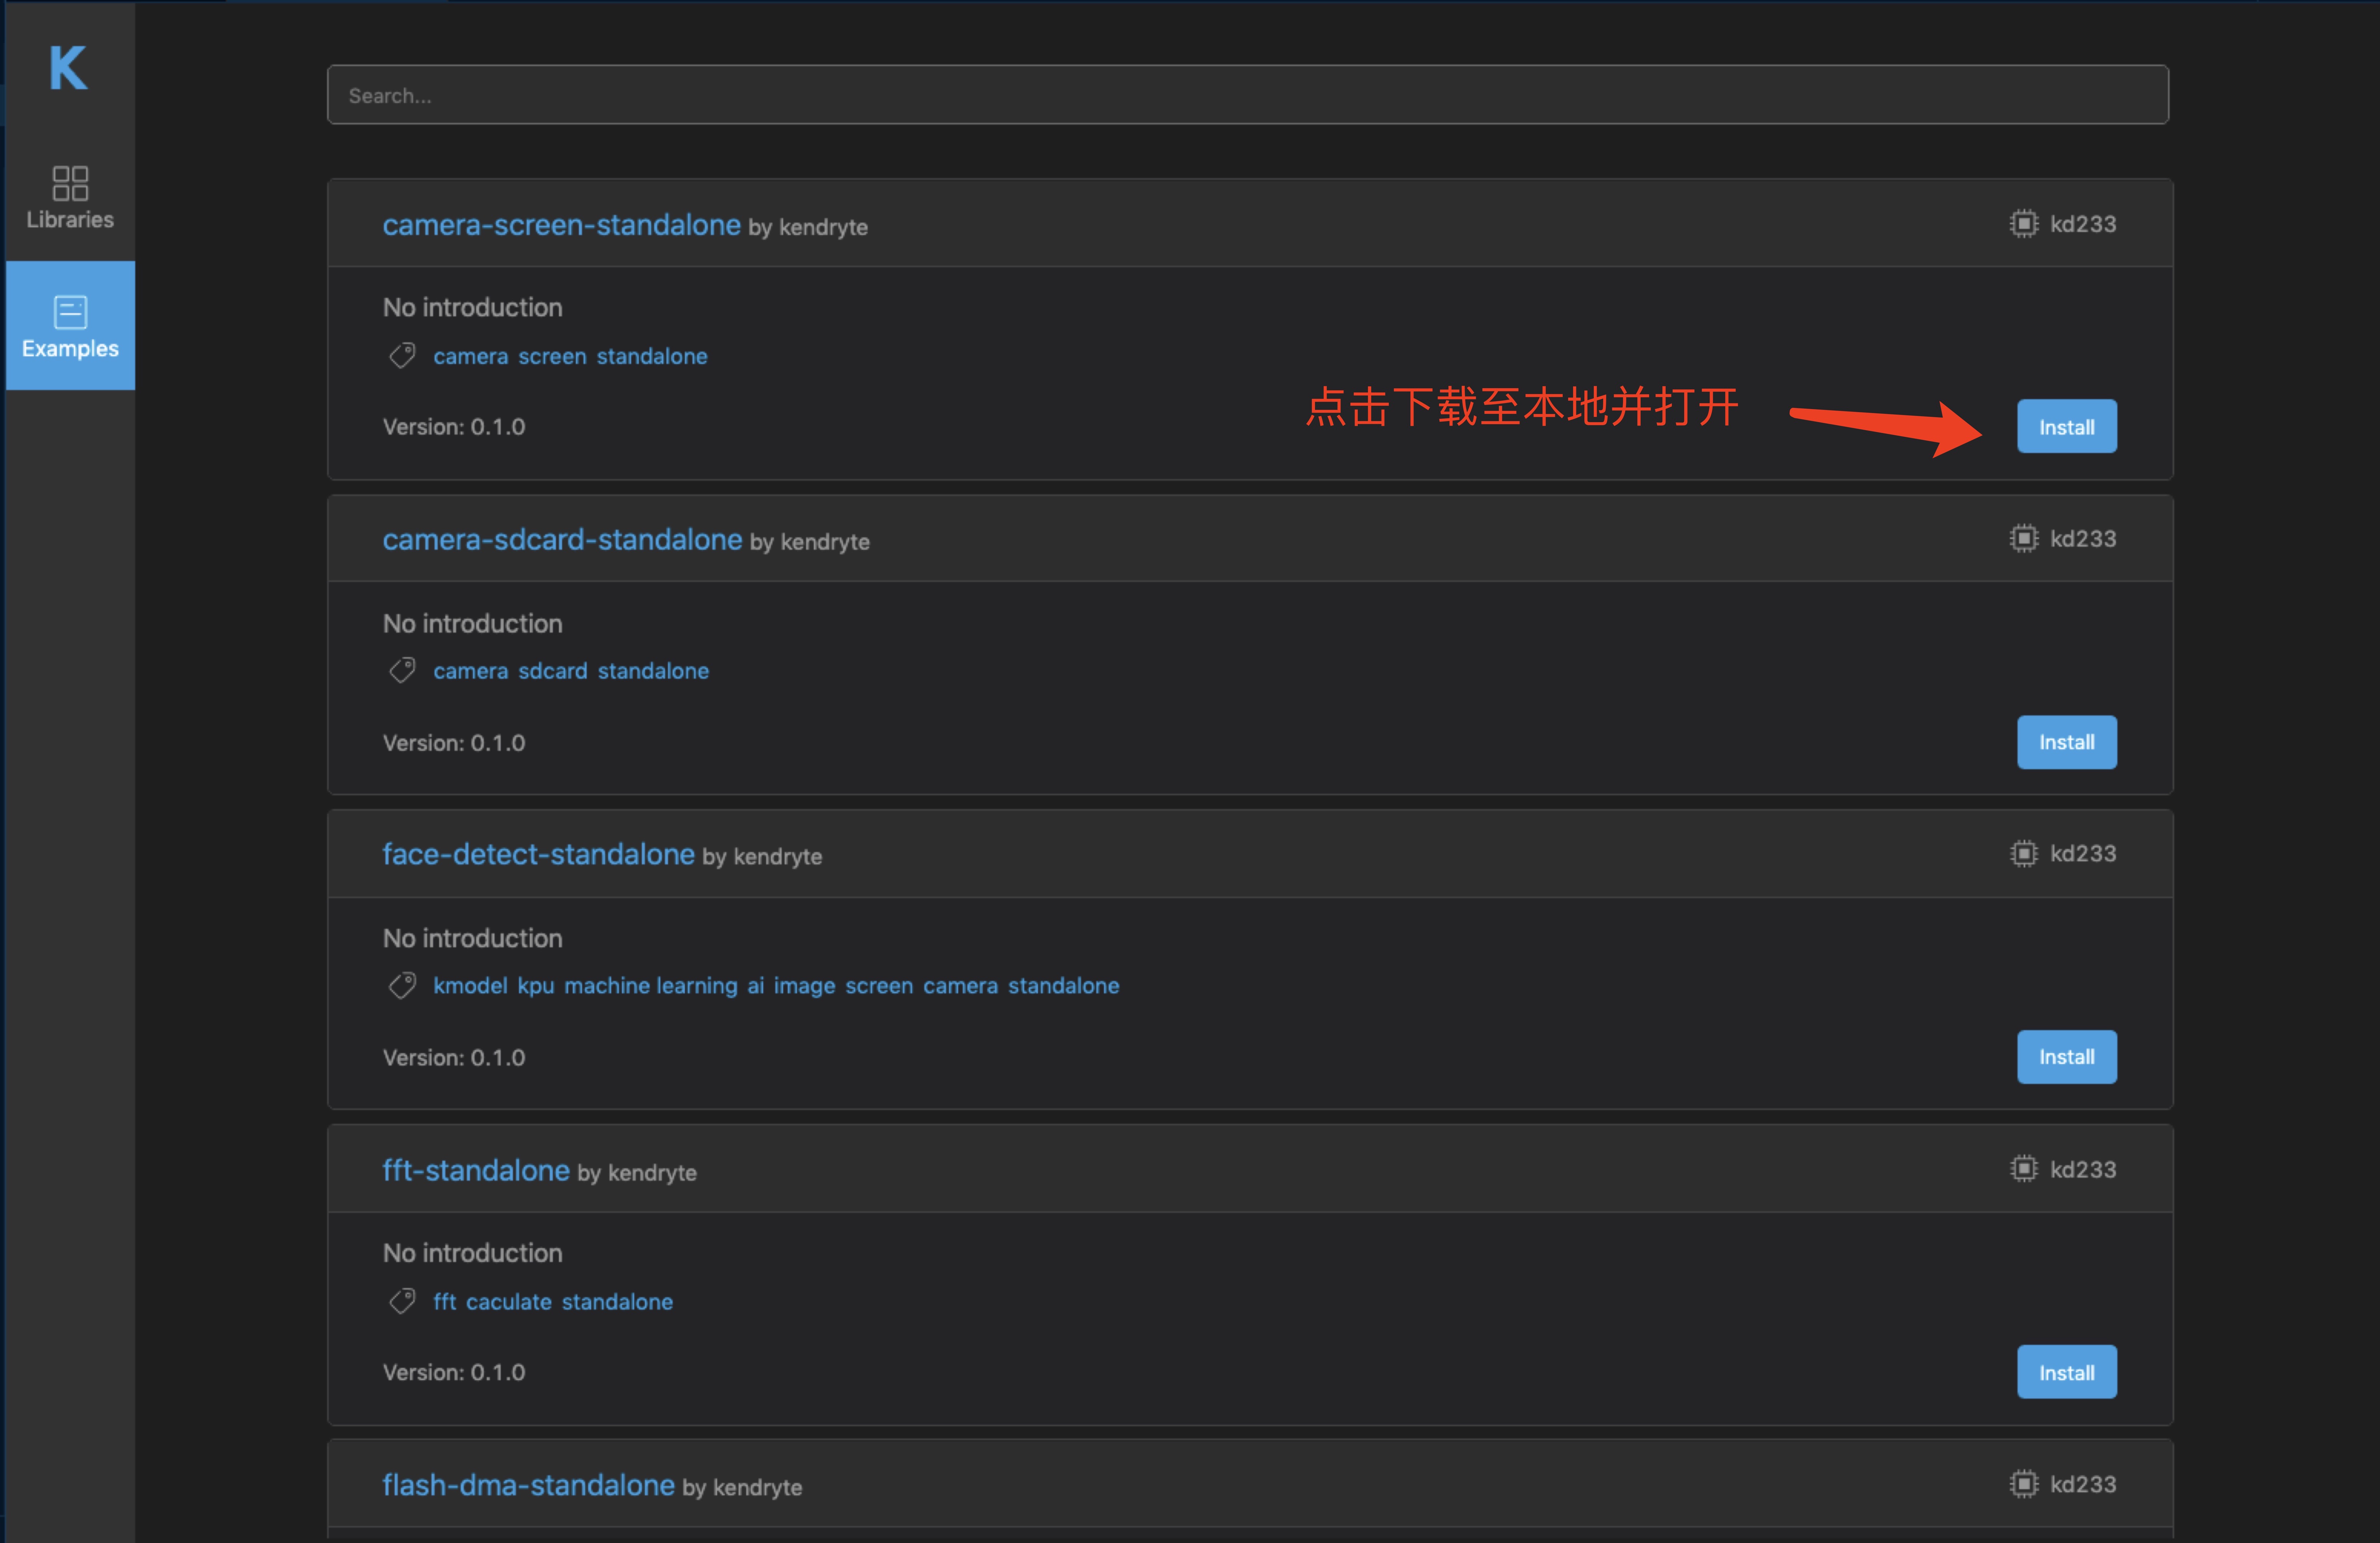
2.选择一个项目下载至本地并打开。
|
||
|
||
|
||
|
||
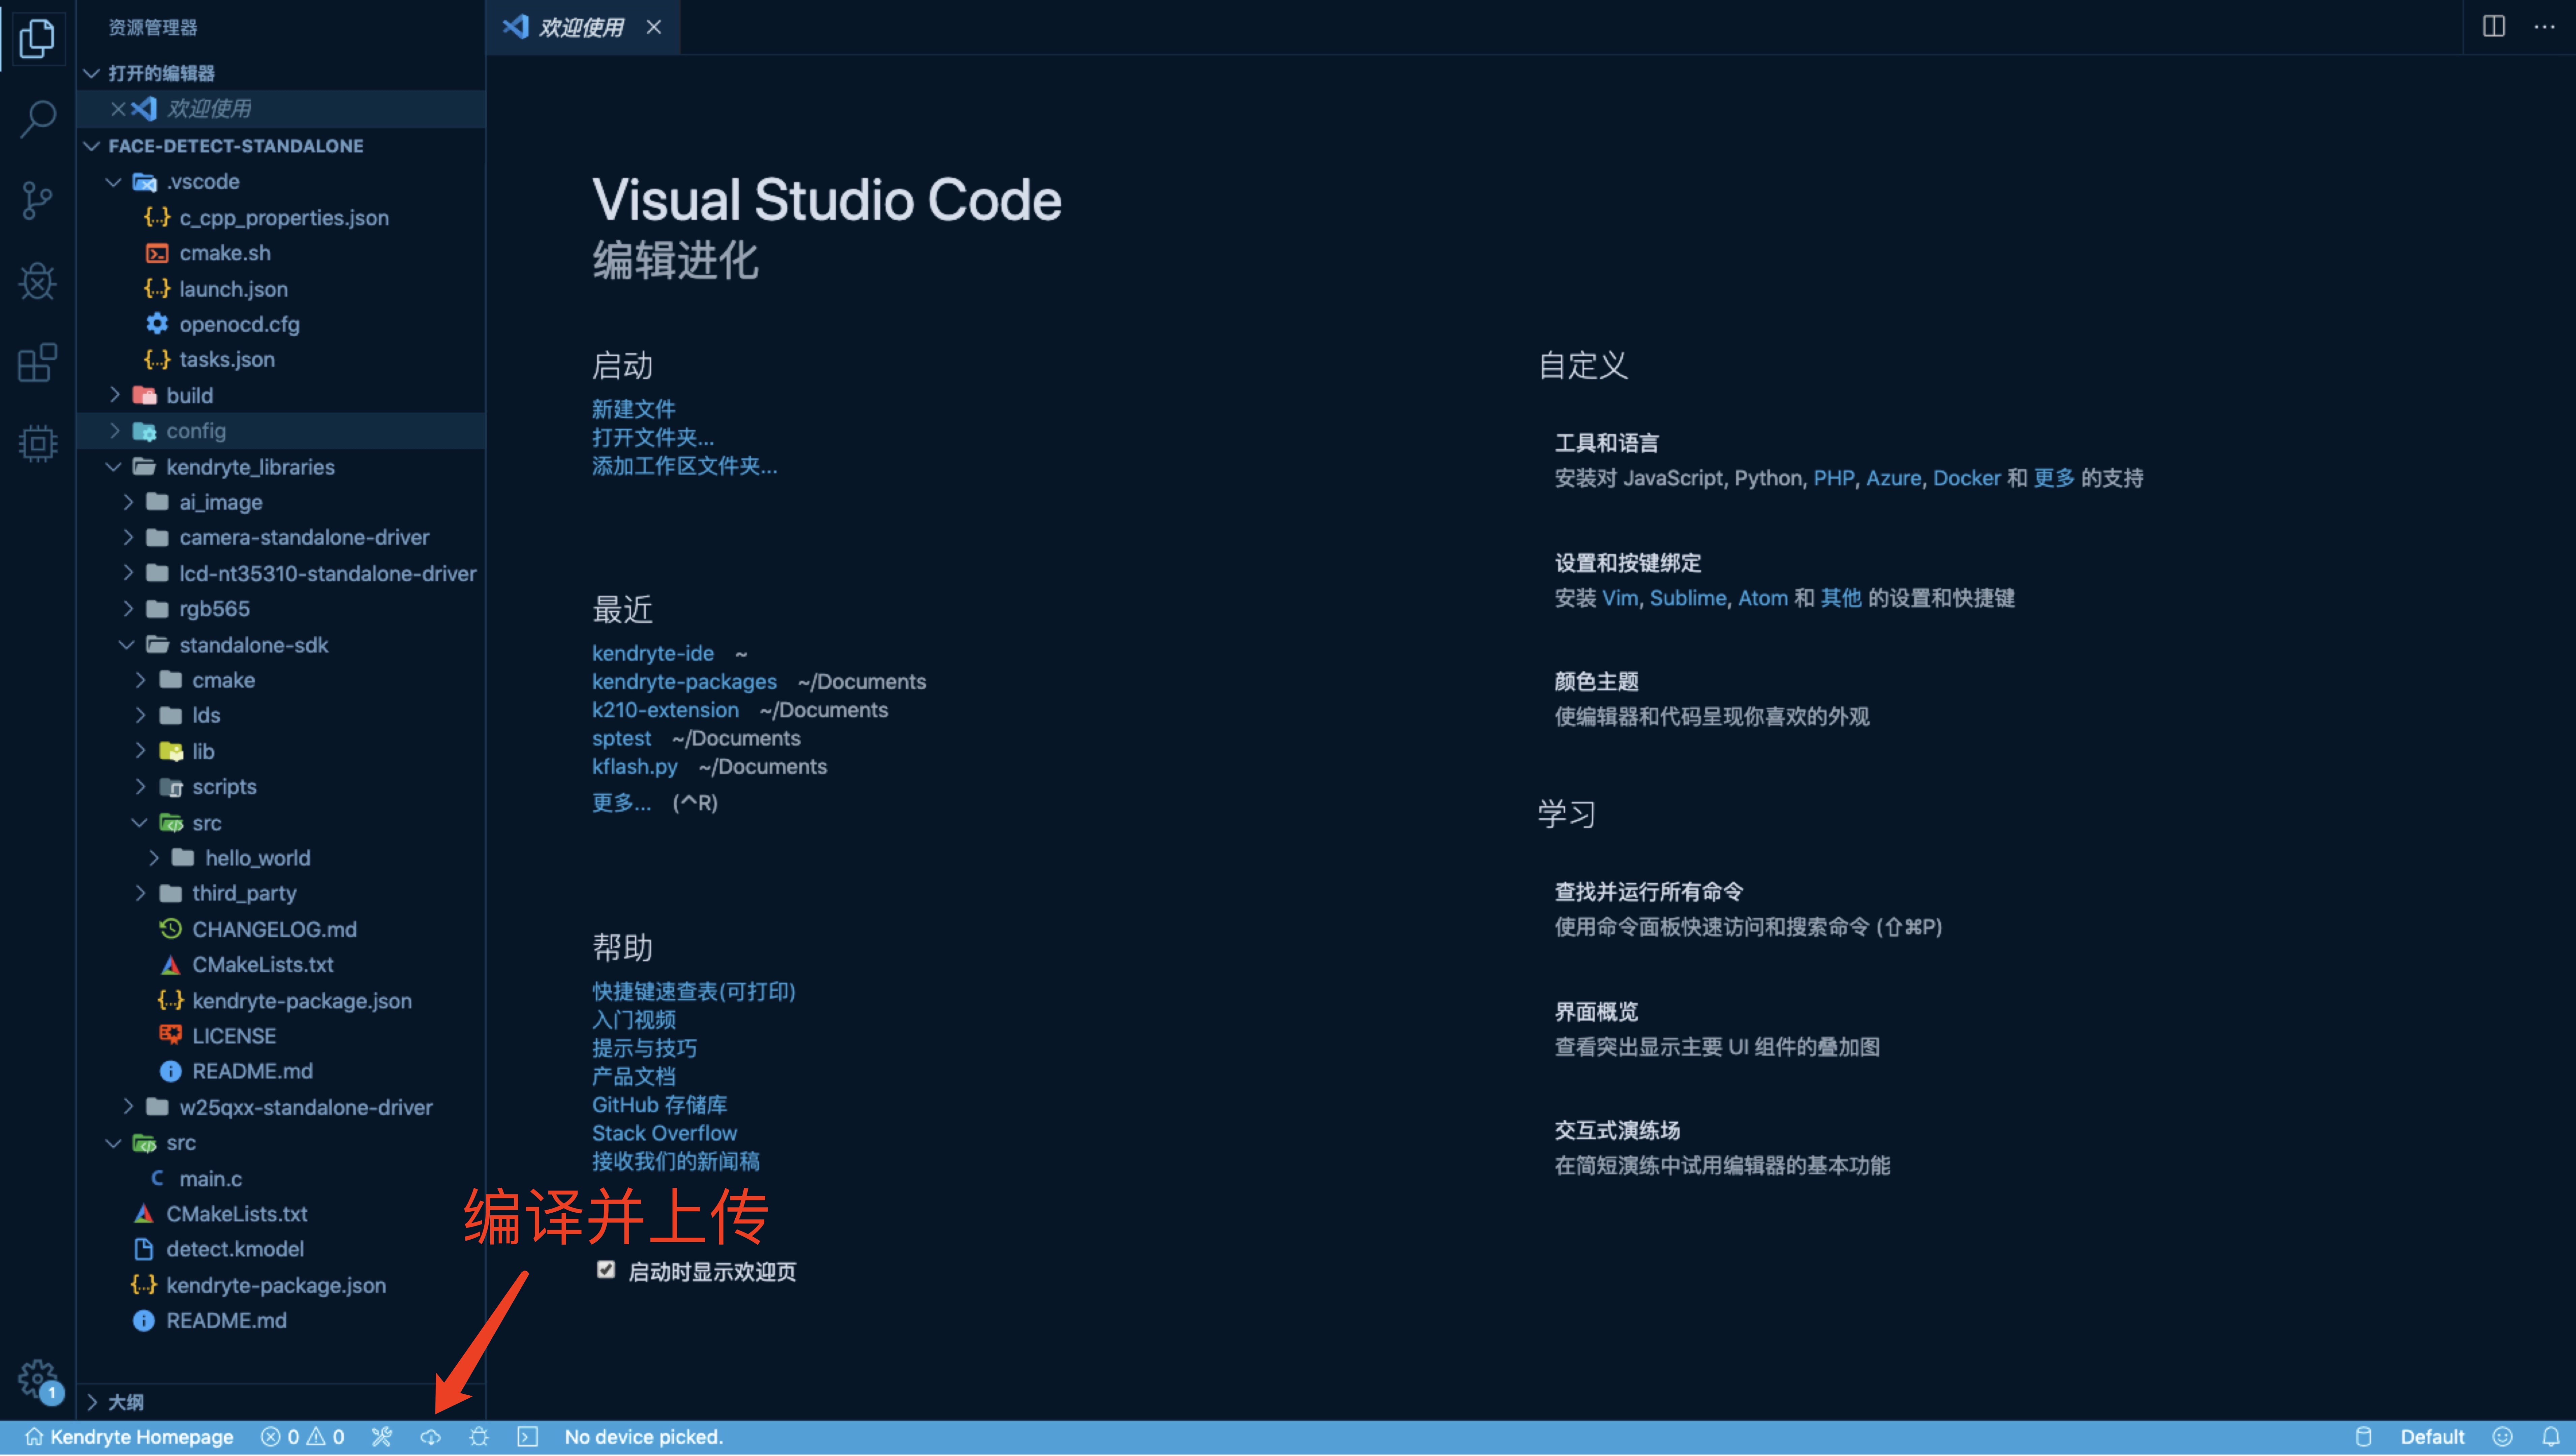
3.点击状态栏中的编译并上传将项目通过串口烧写至开发板。
|
||
|
||
|
||
|
||
4.在开发板上查看效果。
|
||
|
||
## 项目结构
|
||
|
||
``` Bash
|
||
.
|
||
├── .vscode # 自动生成的调试选项,编译命令以及配置文件目录,修改该目录文件不会生效,该目录文件会被覆写。
|
||
├── CMakeLists.txt # 自动生成的 CMakeLists,手动修改不会生效,只能通过修改配置文件来更改生成内容。
|
||
├── README.md
|
||
├── build # 编译产物目录
|
||
│ ├── CMakeCache.txt
|
||
│ ├── CMakeFiles
|
||
│ ├── Makefile
|
||
│ ├── ai_image
|
||
│ ├── camera-standalone-driver
|
||
│ ├── cmake_install.cmake
|
||
│ ├── compile_commands.json
|
||
│ ├── ${Project-name} # 最终产物
|
||
│ ├── ${Project-name}.bin # 最终产物
|
||
│ ├── lcd-nt35310-standalone-driver
|
||
│ ├── standalone-sdk
|
||
│ └── w25qxx-standalone-driver
|
||
├── config # 引脚配置,模型地址分配地址配置目录,可以自行修改里面的配置文件。
|
||
│ ├── device-manager.json # 模型地址分配
|
||
│ ├── flash-manager.h # 模型地址分配
|
||
│ ├── flash-manager.json # 模型地址分配
|
||
│ ├── fpioa-config.c # 引脚配置
|
||
│ ├── fpioa-config.h # 引脚配置
|
||
│ └── ide-hook-main.c
|
||
├── detect.kmodel # Kendryte 模型文件,可以利用 nncase 来对 tensorflow lite 等模型转换成 kmodel
|
||
├── kendryte-package.json # 项目配置文件
|
||
├── kendryte_libraries # 项目依赖目录,所有依赖都安装在这里,通常不应该修改该目录下的内容
|
||
│ ├── ai_image
|
||
│ ├── camera-standalone-driver
|
||
│ ├── lcd-nt35310-standalone-driver
|
||
│ ├── standalone-sdk
|
||
│ └── w25qxx-standalone-driver
|
||
└── src # 源码目录
|
||
└── main.c
|
||
```
|
||
|
||
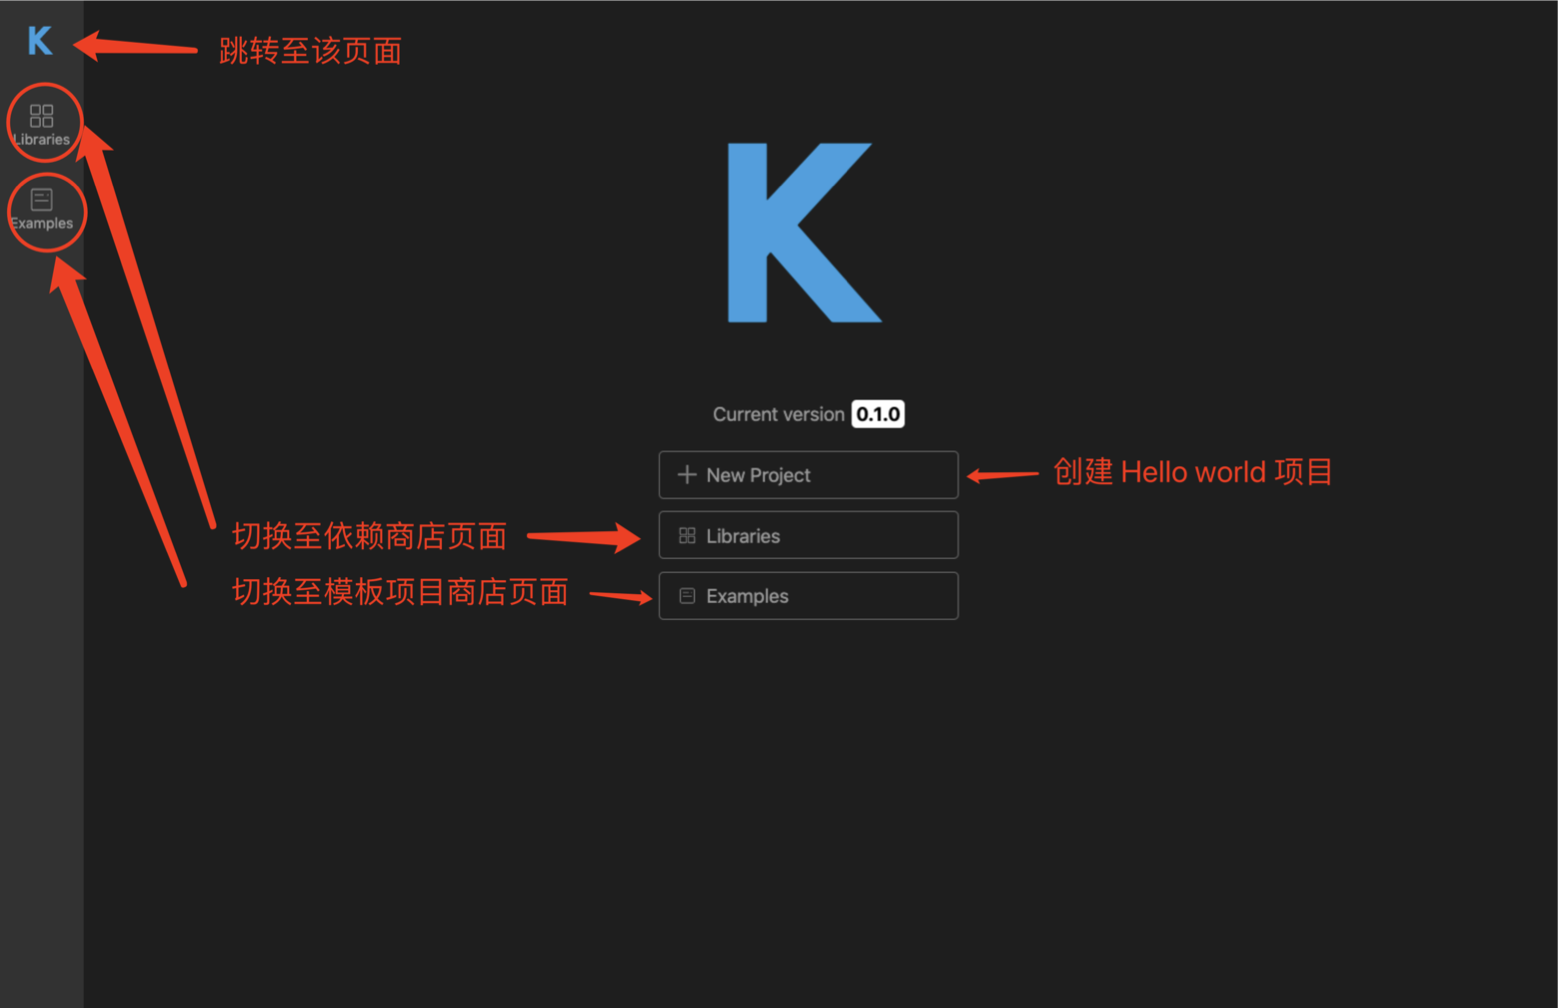
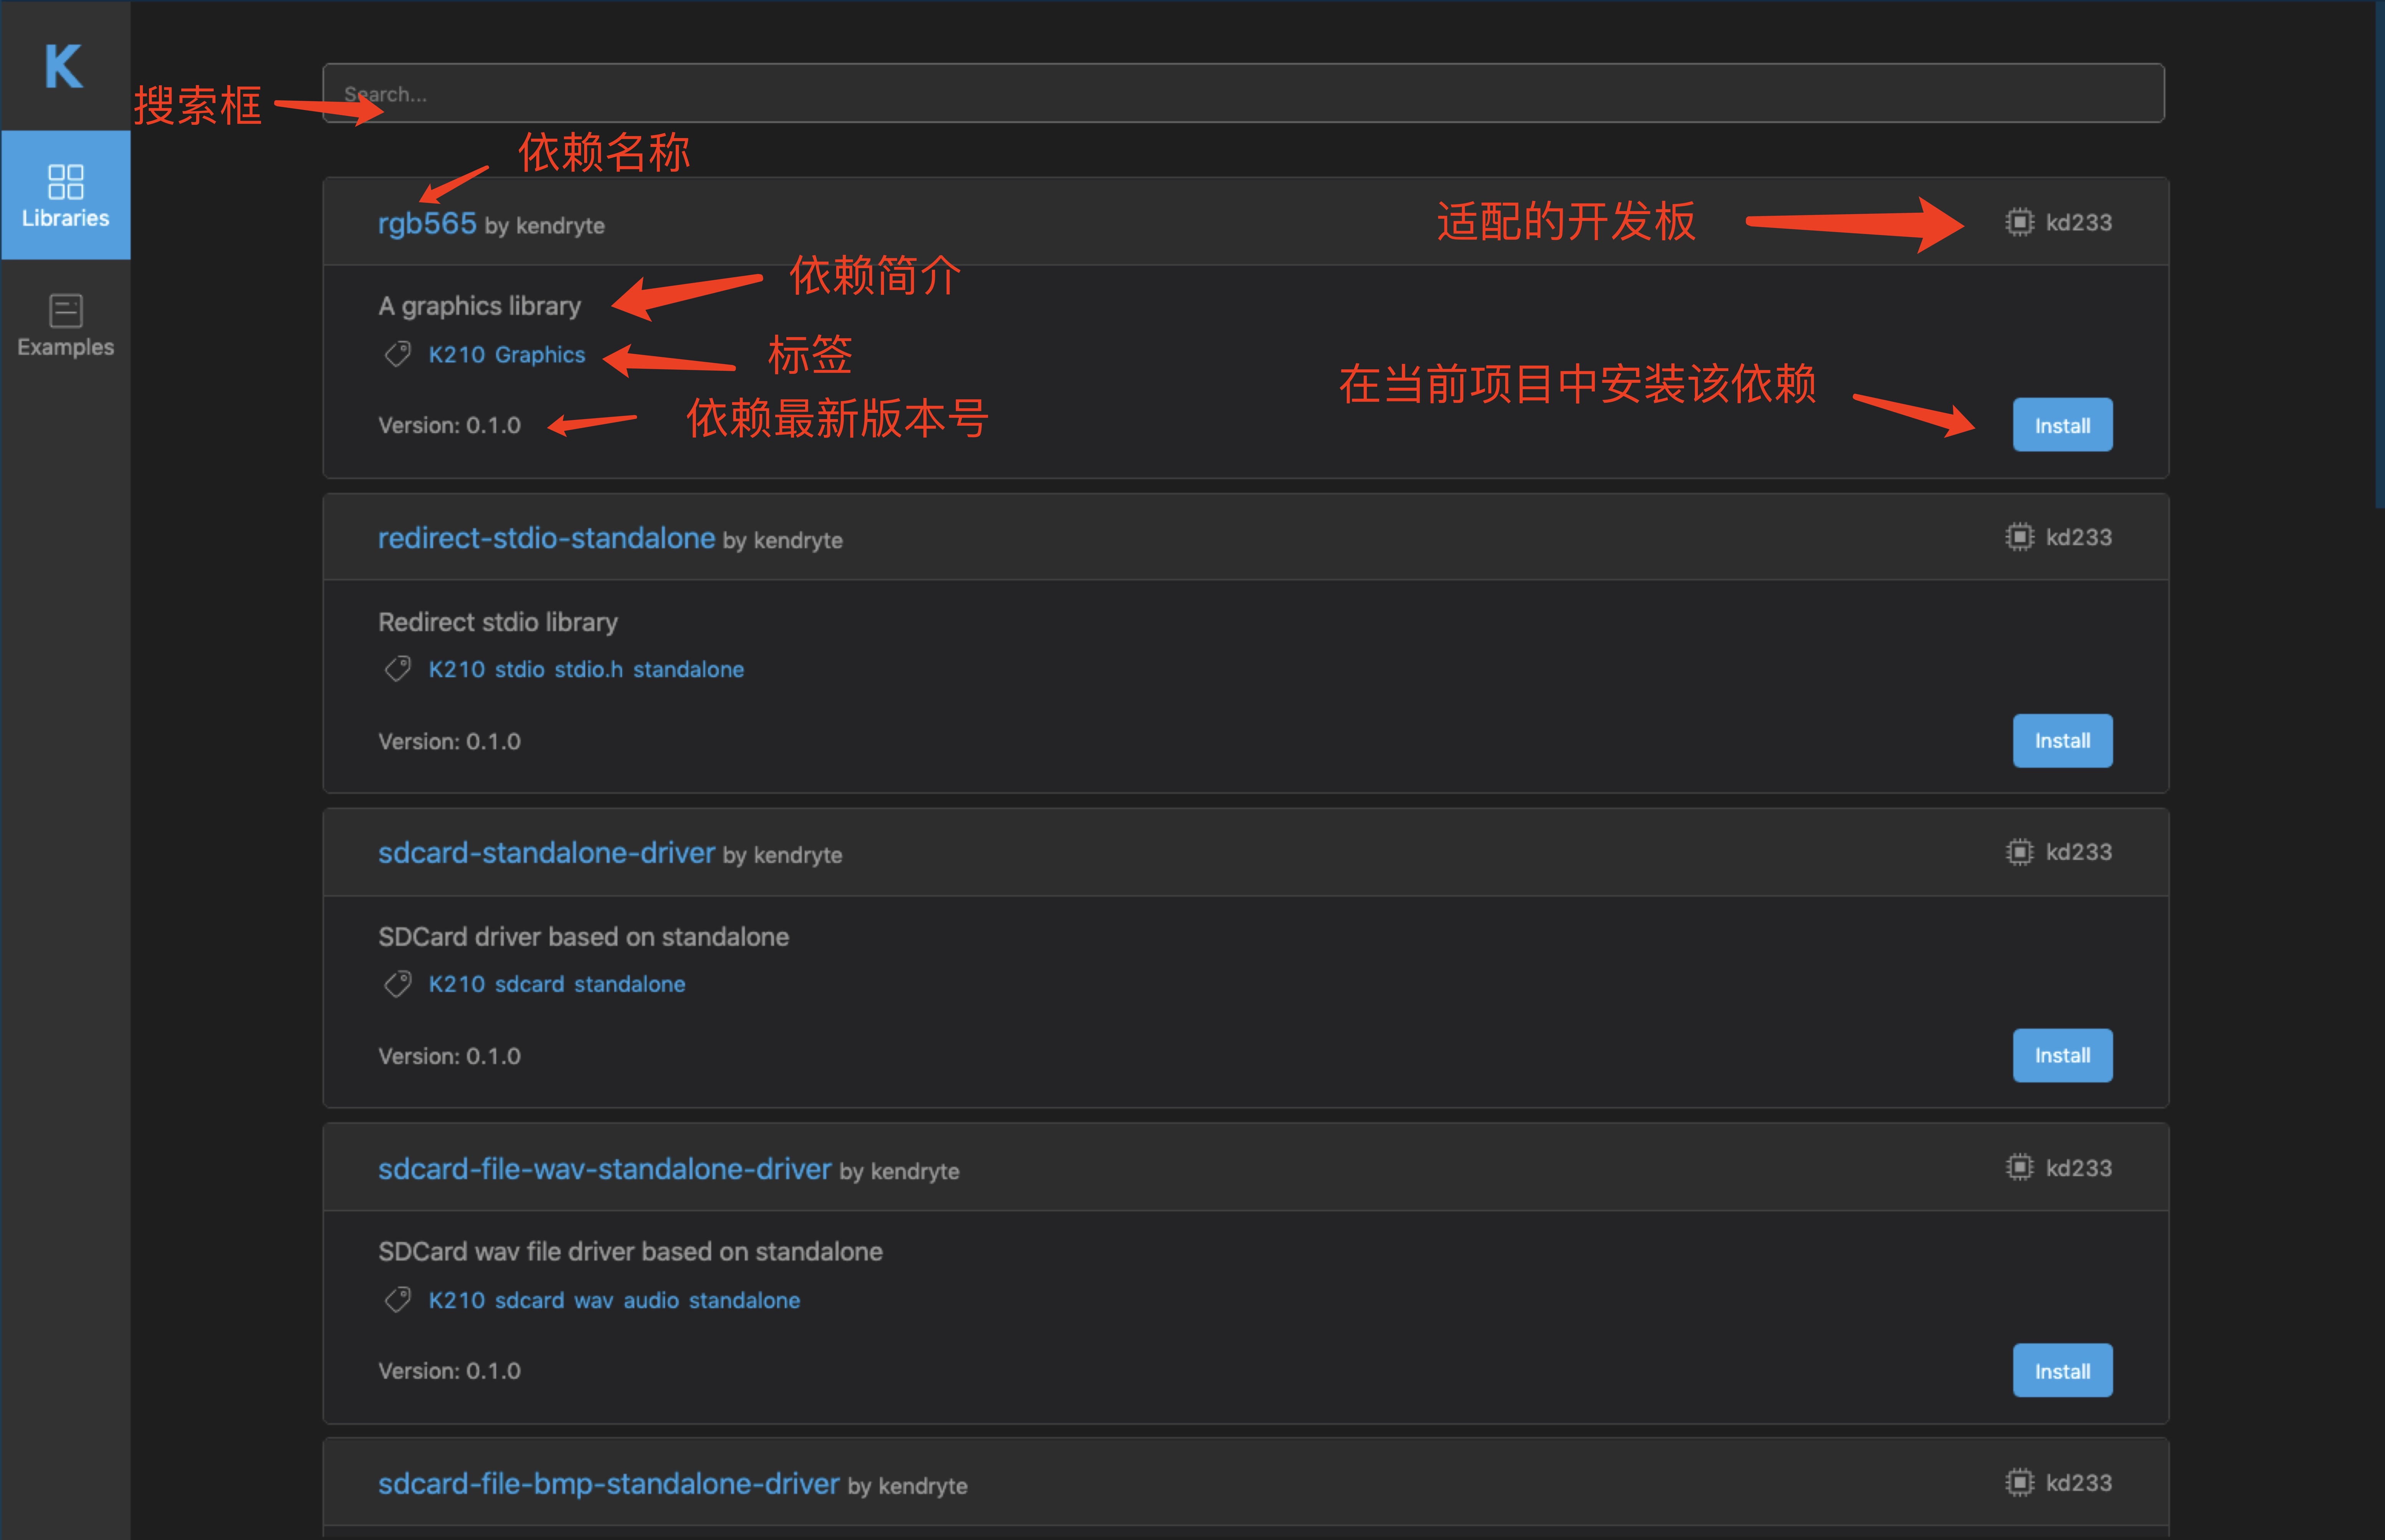
## 界面功能介绍
|
||
|
||
|
||
|
||

|
||
|
||
|
||
|
||
|
||
|
||
## 常见问题
|
||
|
||
### Windows
|
||
|
||
1. Q: 为什么调试时启动 Openocd 报错 libusb_error_not_supported ?
|
||
|
||
A: 请下载 [Zadig](https://zadig.akeo.ie/) 将 JLink 驱动转为 Libusb。
|
||
|
||
### MacOS
|
||
|
||
### Linux
|
||
|
||
1. Q: 为什么调试启动 Openocd 报错 libusb_error_access ?
|
||
|
||
A: 请根据上文[配置调试器权限](#配置调试器权限)来获取调试器权限并重新接入调试设备。如果问题仍未解决,请在 [issue](https://github.com/kendryte/Kendryte-dev-extension/issues) 中联系我们。
|
||
|
||
2. Q: 为什么烧写时需要 sudo 权限密码?
|
||
|
||
A: 只有当前用户没有读取串口设备权限时才会出现需要密码,您也可以自行配置串口设备权限组。
|
||
|
||
## Roadmap
|
||
|
||
- [x] 发布 0.1.0 preview 版本。(2019.12.09)
|
||
- [ ] 串口参数可配置。
|
||
- [ ] 将 serialport 以及 bindings 库移出 node_modules 以保证跨平台可用。
|
||
- [ ] 添加开发模式下 Webview panel 直接监听本地 React 开发服务器功能。
|
||
- [ ] 增加引脚可视化配置。
|
||
- [ ] 添加 CI/CD
|
||
- [ ] 发布 0.2.0 版本。(2020.02)
|
||
- [ ] 增加支持二代 K510 芯片。(2020 Q2)
|